Camera Date: One Subject, One Setting at a Time
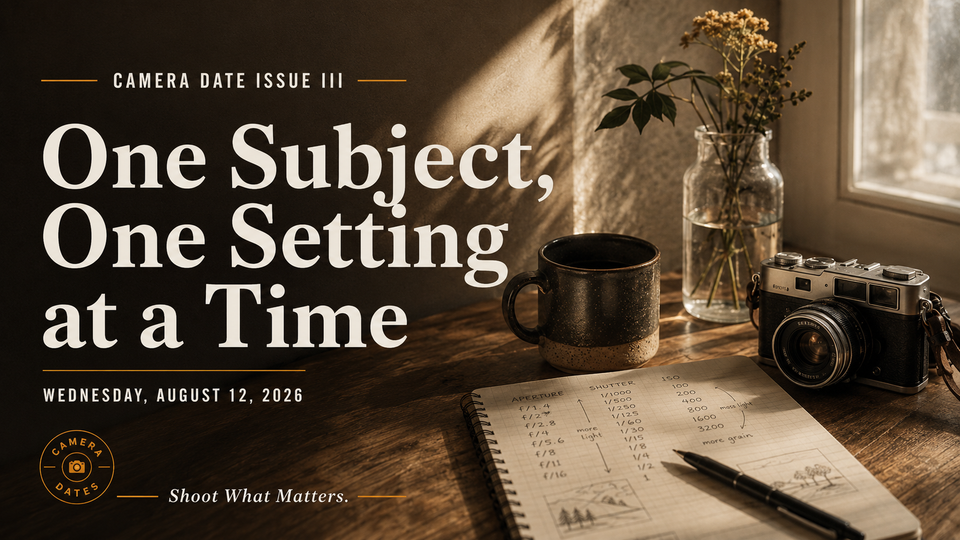
Issue III · Wednesday, August 12, 2026
This Camera Date Is About Learning on Purpose
Most photographers learn their cameras in fragments. They change a setting because somebody online told them to. They try Manual mode for ten minutes, become frustrated, switch back to Auto, and never quite understand what went wrong. They turn dials until the photograph looks better, but because several things changed at once, they cannot explain which adjustment actually helped.
That is not failure. It is simply an inefficient way to learn.
For this Camera Date, you will slow the process down and turn one ordinary subject into a small photography classroom. Keep the scene controlled, change one camera decision at a time, and study what each change does to the finished photograph.
The goal is not to create a portfolio image with every frame. The goal is to understand your camera well enough that stronger photographs become easier later. By the end, you may not know every feature your camera offers. You will know something far more useful. You will know how to teach yourself the next one.
Choose a Subject That Will Cooperate
You'll notice a pattern across Camera Dates. Coffee mugs, old cameras, flowers, vases, worn tools, pieces of fruit, and other small objects will show up more than once. That is intentional. These subjects are easy to control, move, and photograph repeatedly while you study what a particular setting or decision is doing. They are not meant to limit you. They are simply dependable practice subjects.
For this Camera Date, choose something that can remain still while you work through the exercise. A coffee mug, old camera, flower in a vase, family keepsake, musical instrument, pair of boots, or any object with visible shape and texture will work well. Avoid something perfectly flat. You need enough depth that changes in aperture and focus placement will be visible. A mug with a handle, a camera with buttons and a lens, or a flower with several layers of petals will teach you more than a sheet of paper lying on a table.
Feel free to venture beyond the familiar examples. Use something from your workshop, kitchen, garden, office, or collection. The only real requirement is that the subject gives you enough detail, shape, and depth to study.
Place it near a background with some visible information, such as a bookshelf, curtain, window, wooden wall, plant, or room interior. You need enough background detail to see what happens as depth of field changes, but not so much clutter that the scene becomes hard to read.
Choose a location where the light will remain reasonably consistent for at least thirty minutes. Soft window light is excellent. A shaded porch, overcast outdoor area, or simple indoor setup with a lamp can also work.
The subject itself may be simple. That is part of the advantage. When the scene is controlled, the camera’s decisions become easier to see.
Use a Tripod If You Have One
A tripod is useful for this Camera Date because it removes camera position from the experiment. Your composition stays consistent while you change settings, which makes the differences easier to compare later.
Do not skip the exercise because you do not own one. Place the camera on a table, stack of books, railing, beanbag, or another stable surface. You can also work handheld, but mark where you are standing and try to keep the framing as similar as possible. A phone tripod or simple stand is enough for smartphone photographers.
The goal isn't perfect laboratory precision. The point is to avoid changing the composition so much that you can no longer tell whether the setting or the camera position caused the difference.
Begin With the Camera You Actually Use
Don't redesign your entire camera before you start. Use the controls and menus you already know well enough to reach. Make sure the battery is charged and the memory card has space. Set the camera to record the file type you normally use. RAW is useful if you already understand it, but JPEG is perfectly acceptable for this exercise. The lesson happens while you make and compare the photographs, not while editing them later. Turn off any automatic scene mode that dramatically changes color or appearance between frames. A standard or neutral picture style helps, but you don't need to dig deep into menus.
If your camera has Auto ISO, you may use it during parts of the exercise. We will deliberately control ISO later.
Smartphone photographers can complete much of this Camera Date in the standard camera app. Pro or Manual mode will give you more control over shutter speed, ISO, and focus, but the exercise is still valuable even if your phone limits some settings.
Photograph One: Let the Camera Make the First Decisions
Start in Program mode, Auto mode, or whatever general-purpose mode you normally use when you want the camera to handle most of the technical choices.
Frame the subject in a way that feels natural. Make one photograph without changing anything. This is your baseline.
Review the image, but do not judge it too quickly. Look at the camera information if it is available. Note the aperture, shutter speed, and ISO the camera selected. You are not expected to understand every number yet. You are simply recording the camera’s first answer.
Study the photograph itself. Where is the sharpest point? How much of the background is recognizable? Does the image feel too bright, too dark, or reasonably accurate? Is there anything about the result you would already like to control?
Write down the settings or photograph the information screen with your phone. This first frame gives you something real to compare against. From here, you will start taking decisions away from the camera one at a time.
Photograph Two: Change Aperture and Watch the Scene Rearrange Itself
Switch to Aperture Priority mode. Depending on the camera brand, this may be marked A or Av. Choose the widest aperture your lens allows at the focal length you are using. That might be f/1.8, f/2.8, f/3.5, f/4, or something similar. Focus on the most important part of the subject, then take the photograph.
Without moving the camera or subject, change the aperture to a middle setting such as f/8. Make another frame. Then choose a narrower aperture, such as f/11 or f/16, and take a third. You now have three photographs with different depths of field.
Do not only look at whether the background became blurry or sharp. Study the subject itself. At the widest aperture, is only one small area sharply focused? Does part of the subject fall soft? At f/8, does more of the object become readable? At f/16, does the background begin competing with it?
Also notice what happened to the shutter speed. As the aperture became smaller, the camera needed more time to gather light. If Auto ISO was active, the camera may have raised ISO instead. Your camera balanced exposure while you focused on depth of field.
Aperture is not acting alone. Your focal length, your distance from the subject, and the distance between the subject and background also influence how much blur appears. Those relationships deserve their own Camera Date. For now, concentrate on the most important lesson: changing aperture changes how much of the scene appears acceptably sharp, and that changes what the viewer notices.
Choose the aperture version that best supports the photograph, not automatically the one with the blurriest background. Sometimes the subject needs separation. Sometimes it needs context.
Photograph Three: Tell the Meter What You Want
Leave the camera in Aperture Priority and choose the aperture you preferred from the previous step. For this exercise, use the camera’s normal general-purpose metering mode. Depending on the brand, it may be called Evaluative, Matrix, or Multi Segment metering. This is the setting most cameras use by default, and it measures brightness across much of the frame before deciding what exposure it believes will work.
Set exposure compensation to zero and make one photograph. Now set exposure compensation to minus one stop and make another. Then set it to plus one stop and make a third. The exact control varies by camera. It may be a dedicated dial, a button marked with plus and minus symbols, or an on-screen option. On many phones, tapping the subject brings up a small brightness slider. When you're done, place the three versions side by side.
The zero setting shows you the camera meter’s first decision. The darker photograph may protect bright highlights, preserve richer color, or create a quieter mood. The brighter version may reveal more shadow detail and make the subject feel lighter or more open. The meter’s original choice may be correct, but do not assume it is correct simply because the camera selected it.
The camera’s built-in meter measures reflected light. It does not know what the subject is, what color it should be, or how bright you want the finished photograph to feel. It compares the scene with an average brightness and builds the exposure around that assumption.
That is why very bright scenes can confuse it. A pale subject against a bright background may be made too dark because the meter tries to pull all that brightness toward the middle. A dark subject against a dark background may be made too bright because the camera tries to lift the scene toward the same average.
Exposure compensation lets you keep the speed and convenience of Aperture Priority while correcting the camera’s interpretation. You are not replacing the meter. You are telling it that the scene should be brighter or darker than its first recommendation. Choose the version that looks most intentional.
Do not choose based only on which photograph shows the most detail. The right exposure is not automatically the brightest image. It protects what matters, represents the subject properly, and supports the feeling you want.
Some cameras and editing programs can combine differently exposed frames into a single HDR image. That can be useful when a scene contains a very wide range between bright highlights and dark shadows, but it is a separate lesson. For this Camera Date, keep the three photographs separate. The purpose is to compare the meter’s judgment with your own.
The meter offers an opinion. You make the decision.
Photograph Four: Move the Focus Without Moving the Camera
Keep the same composition and aperture. Now choose a single autofocus point or the smallest focus area your camera offers. If you are using a phone, tap different parts of the subject to direct focus.
Make the first photograph with focus placed on the closest meaningful detail. On a camera, this might be the front edge of the lens. On a mug, it might be the nearest rim. On a flower, it could be the closest petal. For the second frame, move the focus point to the subject's middle. For the third, place it on a meaningful detail farther back. The composition has not changed, but the photographs may feel surprisingly different.
Sharpness carries attention. The viewer’s eye is often drawn toward the clearest detail, especially when the rest of the frame is softer. That means focus is not merely a technical requirement. It is part of the composition. Ask what each version seems to be about.
Does focusing on the front detail make the image feel immediate and tactile? Does focusing farther back create depth? Is one choice obviously wrong, or do the different focus points simply tell different stories? If the entire subject remains sharp in every frame, use a wider aperture or move the camera closer. You need enough depth difference to make the lesson visible. You are not trying to prove that one focus point is always correct. You are learning that the camera cannot decide what matters until you tell it.
Photograph Five: Give Shutter Speed a Real Job
Shutter speed becomes easier to understand when something in the frame moves. Keep your main subject in place, but introduce one simple moving element. Pour water into the mug. Let fabric move behind the subject. Spin a small wheel. Wave your hand through the scene. Use steam, falling leaves, a small fan, or another motion that can be repeated safely. Switch to Shutter Priority mode, usually marked S or Tv.
Start with a relatively fast shutter speed such as 1/500 second. Take the photograph while the movement happens. Then try 1/60 second. Finally, try something slower such as 1/8 second or 1/4 second. Use a tripod or stable surface for the slower frames.
The exact speeds will depend on how quickly the object moves, but you should see a clear progression. The fast shutter freezes the action. The middle speed records a little motion. The slow shutter turns movement into a visible path.
Study the camera settings after each photograph. As you selected faster shutter speeds, the camera may have opened the aperture or raised ISO. At slower shutter speeds, it may have used a smaller aperture or lower ISO.
Shutter speed is not simply about avoiding blur. It controls how time appears inside the photograph. A fast shutter can reveal an instant too brief for the eye to study. A slower shutter can show that movement occurred and give the frame energy, softness, or direction. Choose which version best supports the subject. A technically frozen photograph is not automatically more interesting than one that keeps motion visible.
Photograph Six: Use ISO to Protect the Photograph
For this step, reduce the amount of available light. Wait until later in the day, close a curtain, move the setup into a darker part of the room, or turn off one of the lights. Do not make the scene so dark that you cannot work. You simply need less light than before. Switch to Manual mode. Choose the aperture you preferred earlier and select a shutter speed fast enough to prevent camera shake or subject movement.
Start at ISO 100 and make a photograph. If the image is too dark, raise ISO to 400 and try again. Continue to ISO 800, 1600, or higher until the photograph reaches a useful brightness. If Manual mode still feels unfamiliar, remain in Aperture Priority and turn off Auto ISO. Set ISO manually while watching how the shutter speed changes. Compare the photographs at normal viewing size before zooming in closely.
At lower ISO settings, the image may be cleaner but too dark or more vulnerable to blur because the shutter speed becomes slower. At higher ISO settings, you may see more noise, less fine detail, or color shifts, but the photograph may also be sharper and properly exposed. Now compare the sharp, high-ISO frame with a cleaner but blurred low-ISO frame. Which one is actually more useful?
ISO is not free. Raising it can reduce image quality. But refusing to raise it can also destroy a photograph through motion blur or underexposure. The lesson is not to use the highest ISO available. The lesson is to stop treating ISO as a score that tells you whether you succeeded. ISO is one way you solve the light you were given.
Photograph Seven: Build the Final Frame Deliberately
Return the light to a condition you like. Keep the same subject, but now allow yourself to make the strongest photograph you can. You may move the camera or change lenses. You may change your focal length, background distance, camera height, or composition. The controlled comparison portion is complete. Before touching any setting, decide how you want the photograph to feel.
Should the subject feel quiet, dramatic, clean, nostalgic, bold, or intimate? Should the background remain visible, or should it soften? Is there movement to freeze or show? Which detail deserves the sharpest focus? Should the photograph be bright and open or darker and more restrained? Now change your settings based on your answers.
Select the aperture for the amount of depth you want. Choose the shutter speed based on motion. Set ISO high enough to support those decisions. Place the focus point deliberately. Use exposure compensation if the meter does not give you the brightness you intended.
Make the photograph. Review it and identify one weakness. Do not change everything. Change only the control connected to that weakness.
If the background is too sharp, adjust the aperture, distance, or focal length. If the moving element is blurred unintentionally, increase the shutter speed. If the subject is too dark, correct the exposure. If the wrong detail holds attention, move the focus point.
Make another photograph. This is the feedback loop you are trying to build. Observe the result, identify the problem, choose the connected control, and try again.
You are no longer turning dials randomly. You are diagnosing the photograph.
Review the Session Before Editing
Open the photographs on the largest screen available. Group them by lesson rather than by the time they were taken.
Place the three aperture images together. Which change is easiest to see? Which aperture made the subject strongest? Did the widest aperture make too little of the subject sharp? Did the narrowest aperture introduce distracting background detail? Compare the three exposure compensation frames. Which one matches the mood you intended? Did the camera’s zero setting look correct, or did you prefer your own adjustment? Study the focus placement images. How did the sharpest point change the photograph’s meaning? Did one focus choice pull attention toward a detail you had barely noticed before?
Look at the shutter speed sequence. Which version best communicates motion? Was complete sharpness actually the strongest choice? Compare the ISO images at normal size and then at full magnification. At what point does noise become noticeable on your camera? More importantly, at what point does it become unacceptable for the kind of photograph you are making?
Finally, compare the baseline photograph with your final deliberate frame. Do not ask only which one looks better. Ask why it looks better. Was the improvement caused by depth of field, exposure, focus placement, shutter speed, ISO, composition, or several deliberate decisions working together? Write down your answer in one paragraph.
Make a Personal Camera Cheat Sheet
Before putting the camera away, create a small note for yourself. Write down where exposure compensation is located. Record how to move the focus point. Note the widest aperture your lens allowed at the focal length you used. Write down the highest ISO from the session that still looked acceptable to you.
This is not meant to become a complete manual. It is a personal reminder based on actual experience in your own handwriting. A camera setting becomes easier to remember when it is attached to a photograph you made, a problem you encountered, and a decision that solved it. Keep the note in your phone, camera bag, or Scrivener project. Add to it after future Camera Dates. Keep a Camera Date Personal Journal.
Over time, you will build a guide to your own camera that is far more useful than a list of every feature it contains.
What You Just Learned
You did not master your entire camera today. That was never the goal. You learned that aperture changes how much of the scene appears sharp. You learned that shutter speed changes how movement is recorded. You learned that ISO helps support the aperture and shutter speed the photograph requires. You learned that you can correct the meter, that the focus point carries meaning, and that the rear screen can become a feedback tool instead of a place to admire every frame.
Most importantly, you learned how to isolate one decision and watch what it does.
That method can teach you every camera you ever own.
When a setting feels confusing, do not attack the entire machine. Choose one subject. Control the scene. Change one thing. Compare the result. Repeat until the connection becomes visible.
The camera will not suddenly become simpler. You will become more fluent.
That fluency eventually lets the camera disappear from your thoughts while the photograph takes its place.
Shoot What Matters.
Jonathan Charles
CameraDates.com