The Fastest Way to Learn Your Camera ‹› Issue III
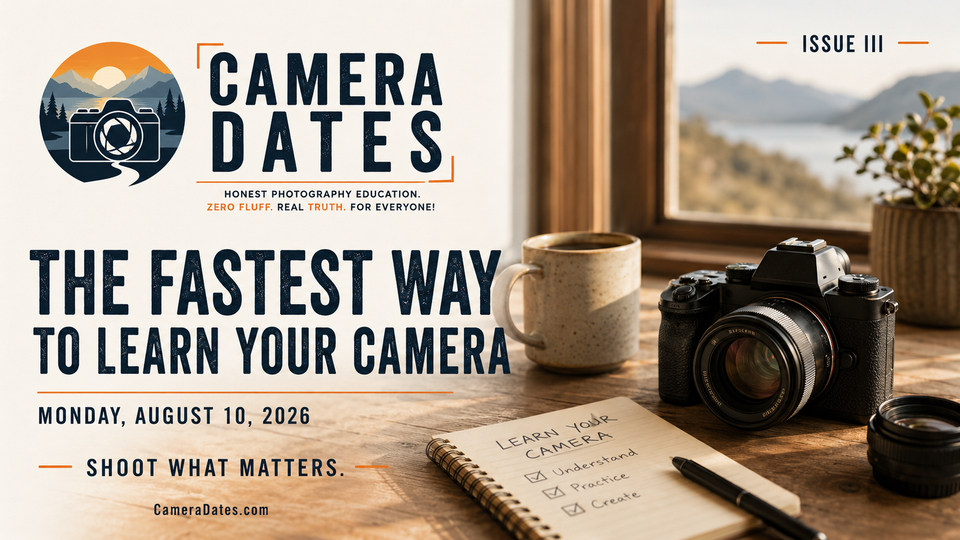
From the Editor: Welcome to Issue III.
Over the past two weeks, we have spent a lot of time looking inside the frame. We have studied backgrounds, checked the edges, and practiced seeing the whole photograph rather than focusing only on the subject in the middle. That foundation matters, and I hope you have already started noticing a difference in your own photography.
This week, we step back slightly and look at the tool itself. Not in a gear-obsessed way. Not in a you need better equipment way. We are going to look at the camera in the way that matters most to me personally: understanding it well enough that it stops interrupting the way you see. Because that is really what this is all about.
The camera should eventually become almost invisible. It should be the thing your eye looks through, not the thing your mind gets stuck on. You should be able to notice the light, recognize the moment, and decide without feeling like you first need to solve a puzzle made of buttons and menu screens.
Issue III is about getting there faster than most people do. Not by memorizing every feature or trying to master the entire camera at once, but by learning deliberately, one control at a time, until those decisions begin to feel natural.
I think this will click for a lot of you.
Let’s get into it.
Jonathan Charles
CameraDates.com
Featured Article: The Fastest Way to Learn Your Camera
Most new cameras arrive with a manual thick enough to stop a door, a menu system designed by several committees that apparently never spoke to one another, and enough customizable buttons to make a beginner wonder whether photography requires a pilot’s license.
The natural response is to try to learn everything.
You watch videos about aperture, shutter speed, ISO, metering, autofocus, white balance, drive modes, exposure compensation, histograms, file formats, and seventeen menu options you did not know existed until somebody on YouTube insisted they were critical. You change several settings, take a few photographs, forget which change caused what, and eventually decide your camera is far more complicated than it needs to be.
The problem is not that you are incapable of learning it. The problem is that you are trying to learn too much at once.
A camera is not one enormous skill. It is a collection of smaller controls, and each one solves a different photographic problem. Aperture affects depth of field. Shutter speed affects motion. ISO helps the camera work in changing light. Exposure compensation lets you correct the camera’s interpretation of brightness. Autofocus determines where sharpness lands. Each control becomes much easier to understand when you stop mixing it together with everything else.
The fastest way to learn your camera is not to memorize the entire machine. Choose one control, give it one clear job, and take enough deliberate photographs to see exactly what it changes. That is when the camera begins to make sense.
Your Camera Is Not a Test You Have to Pass
Many photographers approach their cameras as though there will eventually be an exam. They believe they need to memorize every button, understand every menu item, and know exactly what every setting does before they are qualified to begin taking photography seriously. That is backward. You do not learn a camera so you can finally start making photographs. You make photographs so you can finally learn your camera.
The manual can tell you where exposure compensation is located. It can explain how to change autofocus modes and show you which button controls ISO. What it cannot teach is how those controls feel in a real situation. It cannot show you how quickly the light disappears at sunset, how much shutter speed you need for a restless child, or how a background changes when you move from f/4 to f/11. That understanding comes from use.
Think about learning to drive. You can study the owner’s manual and learn what every symbol on the dashboard means, but none of that replaces sitting behind the wheel. At first, every action requires conscious thought. You check the mirror, find the turn signal, judge the brake, and wonder whether the car is centered in the lane. After enough repetition, those actions become automatic, and your attention moves outward toward traffic, weather, distance, and where you are actually going.
Photography works the same way.
At first, the camera demands your attention. Eventually, it should return that attention to the photograph. The goal is not to spend the rest of your life thinking about buttons. The goal is to practice with the buttons long enough that they stop interrupting the way you see.
Stop Changing Everything at Once
One of the slowest ways to learn photography is to change six things every time a photograph does not work.
The image is too dark, so you change the aperture, raise the ISO, lower the shutter speed, switch metering modes, move closer, and change the focal length. The next photograph looks better, but you have no idea why. Maybe the exposure improved because of the ISO. Maybe the composition improved because you moved. Maybe the background became cleaner because the focal length changed. Maybe the entire difference came from a cloud moving away from the sun while you were adjusting the camera. You got a better photograph, but you did not necessarily learn anything you can repeat.
This is where controlled repetition becomes so powerful. Keep the subject, light, position, and most settings steady. Change one thing. Make another photograph. Compare the two. Now the difference has a name.
If you photograph the same subject at f/4 and f/11 while everything else remains reasonably consistent, you can see what aperture actually did. If you photograph moving water at 1/1000 second and again at 1/4 second, you can see what shutter speed did. If you make one frame at zero exposure compensation and another at minus one, you can see how the camera’s interpretation changed. That is not random practice. It is an experiment.
You do not need to become clinical about every photograph you make, but when you are learning a control, isolate it. Give yourself a chance to see cause and effect. The camera becomes much less mysterious when you stop asking it fifteen questions at once.
Learn the Controls That Actually Change Photographs
Modern cameras contain an astonishing number of options, but not all of them deserve equal attention. You can make excellent photographs without knowing every custom function. You do not need to memorize the entire setup menu, redesign every button, or understand every autofocus case before leaving the house. Those options can be useful later, but they are not where most beginners should spend their limited attention.
Start with the controls that directly change the photograph.
Learn how to adjust aperture. Learn how to recognize when shutter speed is too slow. Understand what ISO is helping you accomplish. Find exposure compensation and use it until reaching for it becomes instinctive. Learn how to place a focus point where you want sharpness, instead of letting the camera choose whatever is closest. Understand the difference between focusing on something still and following something that moves. Those few controls account for a huge percentage of everyday photography. Everything else can be learned when you encounter a real reason to use it.
That matters because people often confuse complete knowledge with useful knowledge. Complete knowledge says you can explain every menu item. Useful knowledge says you can look at a scene, recognize the problem, and know which control will solve it. That is the kind of fluency you are after.
Aperture Priority Is a Classroom, Not a Crutch
Some photographers talk about Manual mode as though it is the final level of seriousness. They imply that anyone using Aperture Priority lets the camera do the work and has somehow failed to graduate. That is nonsense.
Aperture Priority is one of the best learning environments built into your camera. You choose the aperture because you want control over depth of field, subject separation, or lens performance. The camera chooses a shutter speed based on the available light. You watch what happens, study the result, and adjust when necessary. That is not surrendering control. It is assigning one job to the camera so you can focus on another.
Suppose you are photographing a coffee mug near a window. Begin at f/2.8 or f/4. Notice how much of the mug is sharp and what happens to the background. Then try f/8. More of the mug may fall within acceptable focus, and the background may become more recognizable. Try f/16 and watch the shutter speed slow as the lens opening gets smaller.
Keep in mind that aperture doesn't work alone. Your distance from the subject, the distance between the subject and the background, and your focal length also affect how soft that background appears. Those relationships deserve their own lesson, and I will cover them plenty on Camera Dates, but for now, the point is simple. Aperture changes depth of field, while the physical spacing inside the scene also influences the final look.
You've learned several things from one controlled session. Aperture changed the depth of field. The camera changed the shutter speed to maintain exposure. A smaller opening required more time or a higher ISO. You also saw that background softness is not created by aperture alone. That experience is worth far more than memorizing a diagram of aperture blades.
Aperture Priority also teaches exposure compensation naturally. When the camera makes the image too bright or too dark, you do not need to abandon the mode. You tell the camera to adjust its interpretation. That is what exposure compensation is for. Use the mode that helps you understand the photograph. Serious photography is not defined by making every decision manually. It is defined by knowing which decisions matter and taking control of them when they do.
Learn Shutter Speed Where Motion Exists
Shutter speed is difficult to understand when nothing in the frame is moving. You can photograph a vase at 1/60 second and 1/1000 second, and the images may look almost identical once exposure is balanced. The numbers changed, but the lesson remains abstract.
Give shutter speed a real job.
Photograph water from a faucet, a ceiling fan, traffic passing through an intersection, a person walking, a dog running, leaves moving in the wind, or your own hand waving through the frame. Make one photograph with a fast shutter speed and another with a slower one. Now the difference becomes obvious.
A fast shutter speed freezes movement. A slow shutter speed records movement across time. Neither is automatically better. The choice depends on what you want the photograph to communicate. Freezing a bird’s wings may reveal detail the eye could not see. Allowing water to blur may create a sense of movement and calm. A sharp runner can communicate a decisive instant. A runner surrounded by motion blur can communicate speed. Once you understand that, shutter speed stops being a number you are supposed to memorize. It becomes a storytelling choice.
You will also begin noticing its relationship with the other settings. A faster shutter allows less light to reach the sensor, which may require a wider aperture or higher ISO. A slower shutter allows more light but increases the risk of camera movement or subject blur. That relationship is much easier to remember after you have watched it happen.
ISO Is a Solution, Not a Moral Failure
ISO may be the most unnecessarily feared camera setting. Photographers are often told to keep ISO as low as possible, which is generally useful advice when the light and subject allow it. But some people hear that and treat higher ISO as proof they made a mistake. They would rather make a blurry photograph at ISO 100 than a sharp photograph at ISO 1600. The cleaner file is not always the better photograph.
ISO is a tool that helps you maintain the aperture and shutter speed the scene requires when the available light is limited. If you need a fast shutter speed to freeze movement and the lens is already open as wide as practical, raising ISO may be the correct decision.
Yes, higher ISO can introduce noise and reduce some image quality. Modern cameras, however, often handle higher ISO remarkably well, and editing software keeps improving. A little noise is usually easier to accept than motion blur that destroyed the moment. The lesson is not to use high ISO carelessly. The lesson is to understand why you are using it.
Set the aperture for the depth of field you need. Set or protect the shutter speed required for the subject. Then allow ISO to help complete the exposure.
Auto ISO can be especially useful because it lets the camera respond to changing light while you retain control over the more visually important choices. On many cameras, you can also set a maximum ISO or minimum shutter speed, which gives you useful boundaries without requiring constant adjustments.
ISO is not a grade on your performance. It is one way you solve the light you were given.
Exposure Compensation Teaches You Not to Trust the Meter Blindly
Your camera’s meter is useful, quick, and frequently wrong in completely predictable ways. It does not know that snow is supposed to look bright. It does not know that a black dog is supposed to look dark. It does not understand mood, intention, or which part of the frame matters most. It measures reflected light and tries to produce a result near average brightness. That works surprisingly often. It also fails whenever the scene is not average.
A bright background can make the subject too dark. A dark background can cause the camera to brighten the subject too much. A person standing in front of a window may become a silhouette even though their face is what matters.
Exposure compensation is how you tell the camera, “I understand what you were trying to do, but that is not the photograph I want.” Make the frame at zero. Study it. Then make one at minus one and another at plus one. Do not merely choose the brightest image. Ask which version preserves the mood, protects important highlights, and makes the subject look the way it should. This is one of the fastest ways to stop treating the camera’s meter as an authority.
The meter offers an opinion. You make the decision.
Once exposure compensation becomes familiar, Aperture Priority and Shutter Priority become much more powerful because you are no longer simply accepting the camera’s answer. You are working with it.
Autofocus Is About Meaning, Not Just Sharpness
Many beginners think autofocus has one job: make the photograph sharp. That is only part of it. Focus tells the viewer where to look. When more than one part of the frame could hold attention, the point of sharpest detail can change what the photograph seems to be about.
Imagine photographing an old guitar. Focus on the worn strings near the bridge and the image becomes about use, age, and texture. Focus on a name written near the top and the photograph may become about ownership or memory. Focus on the body of the guitar while the foreground falls soft, and the image may feel more like a portrait of the instrument.
The camera cannot know which story you intend.
That is why learning to move a single focus point matters. Automatic area selection can work beautifully for fast situations, especially with modern subject detection, but deliberate photography still requires knowing how to tell the camera exactly where sharpness matters.
Start with still subjects. Use a single focus point or a small focus area. Place it on the most important detail. Make the photograph. Then move the focus to another part of the subject without changing the composition. Compare the results. The sharpness changed, but so did the meaning.
For moving subjects, learn your camera’s continuous autofocus mode and subject tracking. You do not need to explore every autofocus customization immediately. Learn how to start tracking, keep the active area on the subject, and recognize when the camera loses it. Autofocus becomes easier when you stop thinking of it as a technical feature and start thinking of it as an instruction: This is what matters. Keep your attention here.
The Back Screen Is Not Cheating
There was a time when photographers had to wait for film to be developed before they knew whether an experiment worked. That delay taught patience, but it also made learning expensive and slow. Your digital camera gives you immediate feedback. Use it.
The rear screen is not only for checking whether you got a pleasing photograph. It is a teaching tool. Frame, inspect, identify one thing that could be better, adjust one control, and shoot again. The key is to look with a question. Do not simply ask, “Do I like it?”
Ask whether the shutter speed stopped the movement. Ask whether the focus landed on the right detail. Ask whether you're losing highlights. Ask whether changing the aperture made the background more or less useful. Ask whether the exposure matches the way the scene felt.
The histogram can help when the screen is difficult to judge in bright light. It does not tell you whether the photograph is good, but it can show whether important tones are being pushed beyond what the file can record.
You do not need to stare at the screen after every frame forever. The goal is to use feedback deliberately while learning, then rely on it less as the controls become familiar. Review is valuable when it leads to a decision. It becomes a distraction when it merely interrupts the experience.
Build a Feedback Loop, Not a Pile of Photographs
Repetition differs from mindless volume. Taking two hundred photographs is not automatically better practice than taking twenty. If every frame is made from the same position with the same settings and no thought between them, you have practiced pressing the shutter two hundred times. A useful feedback loop looks different. Make a photograph. Study it. Identify the strongest and weakest parts. Change one thing. Make another. Compare the result. Keep the change if it helped. Reverse it if it did not. Then move to the next decision.
That process may produce fewer photographs, but each one teaches you something. This is how skill develops more quickly. You don't wait until you get home to discover every mistake. You are correcting some of them while the subject, light, and opportunity are still in front of you. There is nothing wrong with shooting freely during a fast moment. Wildlife, sports, children, events, and changing weather do not always allow careful experiments. But controlled practice makes you more capable when those faster moments arrive.
The quiet session with a coffee mug can help you react more intelligently at a wedding. The afternoon spent learning shutter speed on moving water can help when a bird suddenly takes flight. Practice becomes useful when it transfers.
Learn One Button Before Customizing Ten
Camera customization is wonderful once you know what you need. Before that, it can become another form of procrastination.
Photographers sometimes spend hours assigning functions to buttons they barely understand. They copy another person's setup from a video, even though that person photographs completely different subjects. Then they forget where everything was placed and assume the camera is difficult.
I have done exactly that. Once, I spent an entire afternoon reorganizing every button on a camera I had owned for three weeks, copying a setup from a YouTube video made by someone who shoots sports for a living. I shoot landscapes and portraits mostly. By the end, I had a camera that felt like someone else's and photographs that looked exactly the same as before I started. The camera was not the problem. I was just avoiding the part where you actually go outside and use it.
Leave most controls near their defaults at first. If you get a used body, reset to defaults first thing. Use the camera long enough to discover which actions interrupt you repeatedly. Perhaps exposure compensation is buried too far away. Maybe switching autofocus modes takes too long. Maybe you need faster access to subject detection or drive mode. Now customization has a reason.
Assign the functions you use often to the controls your fingers can reach comfortably. Change one or two things, then use them for several sessions before redesigning the camera again. A customized camera should reduce thought. It should not create another system you have to memorize.
A Seven Day Method That Actually Works
You can learn more about your camera in one focused week than in months of occasionally changing random settings. Stay in the general idea assigned to each day as your main subject, but do not feel limited to the one example given. Within that area, explore the different modes, options, and situations your camera offers. The goal is not to check off one tiny exercise and move on. Spend enough time with one part of the camera to understand how it behaves.
On the first day, learn how to move the focus point and switch between still subject and continuous autofocus. Photograph one stationary object, then something moving slowly.
On the second day, use Aperture Priority and photograph one subject at several apertures. Pay attention to depth of field, background detail, and the shutter speeds the camera selects.
On the third day, study shutter speed using a moving subject. Freeze it, blur it slightly, then create obvious motion.
On the fourth day, use exposure compensation. Photograph something bright, something dark, and something strongly backlit. Make the camera’s first version, then make your version.
On the fifth day, explore ISO. Photograph in good light, shade, and a darker room. Compare the files, but also compare the shutter speeds you were able to maintain.
On the sixth day, combine the controls in one simple situation. Choose an aperture for the look, protect the shutter speed for the subject, and allow ISO to solve the remaining light.
On the seventh day, go make photographs without turning the session into a test. Use what you learned, notice where you still hesitate, and write down the next control that deserves its own practice session.
The point is not to master the camera in seven days. The point is to stop treating it like one giant problem.
Instinct Comes From Repeating Decisions
Eventually, something changes. You stop searching for the exposure compensation button. Your thumb finds it. You notice a moving subject and immediately recognize that the shutter speed is too slow. You place the focus point without staring at the controls. You see a bright background and predict how the meter will react. The camera has not become simpler. You have become more instinctive.
That is built from repeated decisions, not repeated explanations. Videos, manuals, classes, and articles can show you the path. They can save you from misunderstanding the controls and give you useful exercises. But your fingers, eyes, and mind still have to make the connections together.
That is why deliberate practice works so much faster than passive study. You are not merely storing information. You are building a response. That is why I built Camera Dates!
The goal is not to become someone who can recite what aperture does. The goal is to recognize when depth of field is hurting the photograph and know how to change it without losing the moment. That is a completely different level of understanding.
You Do Not Need to Learn Everything Today
There will always be another feature in the camera. Another menu. Another autofocus option. Another person online explaining that their custom setup changed everything. Let the camera contain more than you need right now. You do not have to conquer the entire machine before making something meaningful with it. Learn the controls that solve the problems in front of you. Add new ones as your photography asks more demanding questions.
The fastest way to learn your camera isn't to rush through every setting. It is slowing down long enough to understand one. That is the Camera Date way!
Choose a subject. Keep the situation controlled. Change one thing. Study the result. Make another photograph. Repeat until the connection between the control and the image becomes obvious. Then take that knowledge somewhere real and use it.
Well, that is about all I have for this week. I hope you found a few useful nuggets in here somewhere, and more importantly, I hope something clicked that makes your camera feel a little less complicated and a little more like a tool you can trust.
Your matching Camera Date arrives Wednesday morning. We will turn one simple subject into a personal camera laboratory and work through focus, aperture, exposure compensation, shutter speed, and ISO, one deliberate change at a time.
You will not learn every setting in your camera. You will learn something more valuable. You will learn how to teach yourself the next one.
📷 Shoot What Matters
Jonathan Charles
CameraDates.com